Piapi Mcp サーバー
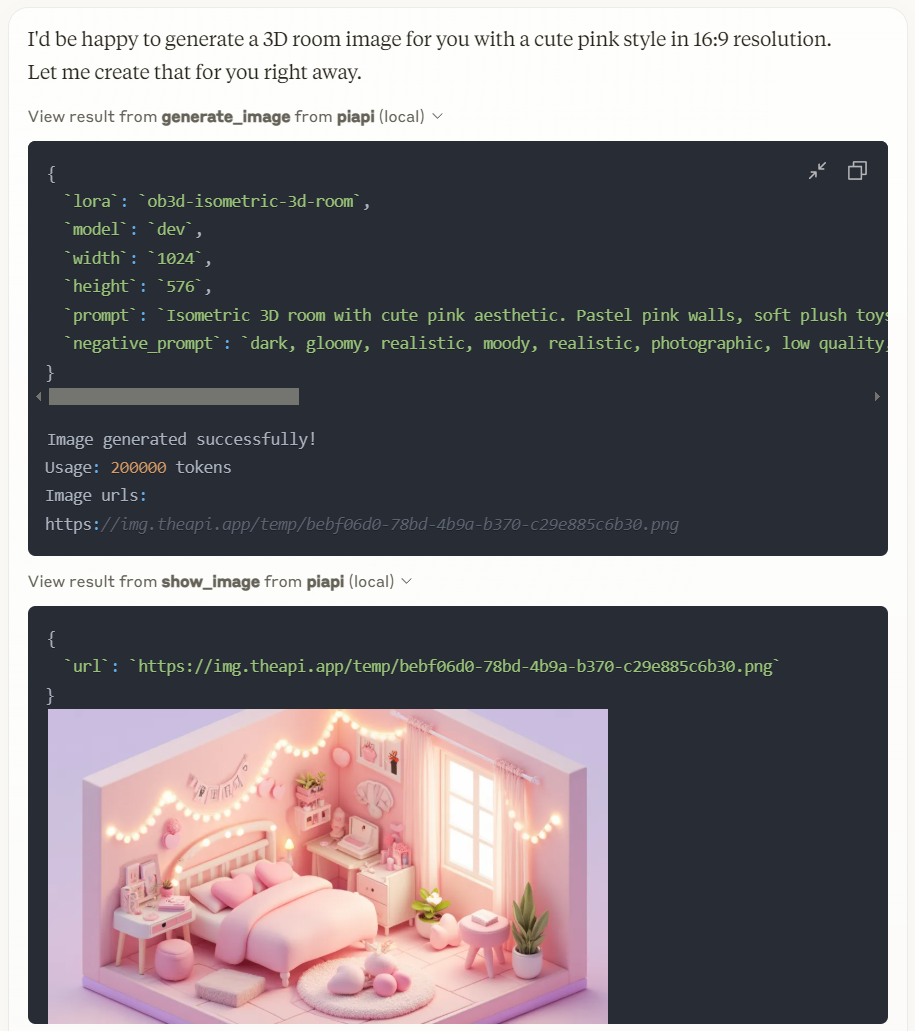
TypeScriptを使用したモデルコンテキストプロトコル(MCP)サーバーの実装で、PiAPIのAPIと統合されています。PiAPIは、ユーザーがClaudeや他のMCP互換アプリから直接Midjourney/Flux/Kling/LumaLabs/Udio/Chrip/Trellisを使用してメディアコンテンツを生成できるようにします。
概要
PiAPI MCPサーバーとは?
PiAPI MCPサーバーは、Model Context Protocol (MCP) サーバーのTypeScript実装であり、PiAPIのAPIとシームレスに統合されています。この革新的なサーバーは、ユーザーがClaudeや他のMCP互換アプリケーションから直接、Midjourney、Flux、Kling、LumaLabs、Udio、Chirp、Trellisなどのさまざまなプラットフォームを使用してメディアコンテンツを生成できるようにします。これは、ユーザーのコマンドとこれらのプラットフォームのメディア生成機能との間の橋渡しを行い、ユーザー体験を向上させ、コンテンツ作成を効率化します。
PiAPI MCPサーバーの特徴
- TypeScript実装:TypeScriptを使用して構築されており、型安全性とより良い開発プラクティスを保証します。
- MCP互換性:Model Context Protocolに完全に準拠しており、他のMCP互換アプリケーションとの簡単な統合を可能にします。
- マルチプラットフォームサポート:さまざまなメディア生成プラットフォームをサポートしており、ユーザーが異なるサービスでコンテンツを作成できるようにします。
- ユーザーフレンドリーなインターフェース:使いやすさを考慮して設計されており、ユーザーが広範な技術知識なしでメディアコンテンツを生成できるようにします。
- オープンソース:公開リポジトリとして利用可能であり、開発者がサーバーの機能を貢献、修正、強化できるようにします。
PiAPI MCPサーバーの使い方
-
インストール:GitHubからリポジトリをクローンし、npmまたはyarnを使用して必要な依存関係をインストールします。
git clone https://github.com/apinetwork/piapi-mcp-server.git cd piapi-mcp-server npm install
-
設定:提供された設定ファイルでAPIキーと設定を設定し、希望するメディア生成プラットフォームに接続します。
-
サーバーの実行:次のコマンドを使用してサーバーを起動します。
npm start
-
リクエストの送信:サーバーが提供するAPIエンドポイントを使用してメディア生成のリクエストを送信します。リクエストがMCP仕様に準拠していることを確認してください。
-
統合:サーバーをMCP互換アプリケーションと統合して、メディアコンテンツの生成を開始します。
よくある質問
Q1: PiAPI MCPサーバーの目的は何ですか?
A1: PiAPI MCPサーバーは、ユーザーとさまざまなメディア生成プラットフォームとの間の仲介者として機能し、統一されたAPIを通じて効率的なコンテンツ作成を可能にします。
Q2: PiAPI MCPサーバーは無料で使用できますか?
A2: はい、PiAPI MCPサーバーはオープンソースであり、GitHubで無料で利用可能です。
Q3: PiAPI MCPサーバーに貢献できますか?
A3: もちろんです!貢献は歓迎されます。リポジトリをフォークし、変更を加えてプルリクエストを送信できます。
Q4: どのプラットフォームでメディアコンテンツを生成できますか?
A4: サーバーはMidjourney、Flux、Kling、LumaLabs、Udio、Chirp、Trellisなどの複数のプラットフォームをサポートしています。
Q5: 問題を報告したり機能をリクエストしたりするにはどうすればよいですか?
A5: GitHubリポジトリで問題を開くことで、問題を報告したり機能をリクエストしたりできます。
PiAPI MCPサーバーを利用することで、ユーザーはメディア生成プロセスを効率化し、さまざまなプラットフォームでのクリエイティブなワークフローを向上させることができます。
詳細
piapi-mcp-server
A TypeScript implementation of a Model Context Protocol (MCP) server that integrates with PiAPI's API. PiAPI makes user able to generate media content with Midjourney/Flux/Kling/LumaLabs/Udio/Chrip/Trellis directly from Claude or any other MCP-compatible apps.
<a href="https://glama.ai/mcp/servers/ywvke8xruo"><img width="380" height="200" src="https://glama.ai/mcp/servers/ywvke8xruo/badge" alt="PiAPI-Server MCP server" /></a>
Features (more coming soon)
Note: Time-consuming tools like video generation may not complete due to Claude's timeout limitations
- Base Image toolkit
- Base Video toolkit
- Flux Image generation from text/image prompt
- Hunyuan Video generation from text/image prompt
- Skyreels Video generation from image prompt
- Wan Video generation from text/image prompt
- MMAudio Music generation from video
- TTS Zero-Shot voice generation
- Midjourney Image generation
- imagine
- other
- Kling Video and Effects generation
- Luma Dream Machine video generation
- Suno Music generation
- Suno Lyrics generation
- Udio Music and Lyrics generation
- Trellis 3D model generation from image
- Workflow planning inside LLMs
Working with Claude Desktop Example
Prerequisites
- Node.js 16.x or higher
- npm or yarn
- A PiAPI API key (get one at piapi.ai)
Installation
- Clone the repository:
git clone https://github.com/apinetwork/piapi-mcp-server
cd piapi-mcp-server
- Install dependencies:
npm install
- Build the project:
npm run build
After building, a dist/index.js
file will be generated. You can then configure this file with Claude Desktop and other applications. For detailed configuration instructions, please refer to the Usage section.
- (Optional) Test server with MCP Inspector:
First, create a .env
file in the project root directory with your API key:
PIAPI_API_KEY=your_api_key_here
Then run the following command to start the MCP Inspector:
npm run inspect
After running the command, MCP Inspector will be available at http://localhost:5173 (default port: 5173). Open this URL in your browser to start testing. The default timeout for inspector operations is 10000ms (10 seconds), which may not be sufficient for image generation tasks. It's recommended to increase the timeout when testing image generation or other time-consuming operations. You can adjust the timeout by adding a timeout parameter to the URL, for example: http://localhost:5173?timeout=60000 (sets timeout to 60 seconds)
The MCP Inspector is a powerful development tool that helps you test and debug your MCP server implementation. Key features include:
- Interactive Testing: Test your server's functions directly through a web interface
- Real-time Feedback: See immediate results of your function calls and any errors that occur
- Request/Response Inspection: View detailed information about requests and responses
- Function Documentation: Browse available functions and their parameters
- Custom Parameters: Set custom timeout values and other configuration options
- History Tracking: Keep track of your previous function calls and their results
For detailed information about using the MCP Inspector and its features, visit the official MCP documentation.
Usage
Connecting to Claude Desktop
Add this to your Claude Desktop configuration file (~/Library/Application Support/Claude/claude_desktop_config.json
on macOS or %APPDATA%\Claude\claude_desktop_config.json
on Windows):
{
"mcpServers": {
"piapi": {
"command": "node",
"args": ["/absolute/path/to/piapi-mcp-server/dist/index.js"],
"env": {
"PIAPI_API_KEY": "your_api_key_here"
}
}
}
}
After updating your configuration file, you need to restart Claude for Desktop. Upon restarting, you should see a hammer icon in the bottom right corner of the input box. For more detailed information, visit the official MCP documentation
Connecting to Cursor
Note: Following guide is based on Cursor 0.47.5. Features and behaviors may vary in different versions.
To configure the MCP server:
- Navigate to: File > Preferences > Cursor Settings, or use the shortcut key
Ctrl+Shift+J
- Select "MCP" tab on the left panel
- Click "Add new global MCP server" button in the top right
- Add your configuration in the opened mcp.json file
{
"mcpServers": {
"piapi": {
"command": "node",
"args": ["/absolute/path/to/piapi-mcp-server/dist/index.js"],
"env": {
"PIAPI_API_KEY": "your_api_key_here"
}
}
}
}
- After configuration, you'll see a "piapi" entry in MCP Servers page
- Click the Refresh button on the entry or restart Cursor to connect to the piapi server
To test the piapi image generation:
- Open and select "Agent mode" in Cursor Chat, or use the shortcut key
Ctrl+I
- Enter a test prompt, for example: "generate image of a dog"
- The image will be generated based on your prompt using piapi server
To disable the piapi server:
- Navigate to the MCP Servers page in Cursor Settings
- Find the "piapi" entry in the server list
- Click the "Enabled" toggle button to switch it to "Disabled"
Development
Project Structure
piapi-mcp-server/
├── assets/
├── src/
│ ├── index.ts # Main server entry point
├── package.json
├── tsconfig.json
└── .env.example
License
MIT
サーバー設定
{
"mcpServers": {
"piapi-mcp-server": {
"command": "docker",
"args": [
"run",
"-i",
"--rm",
"ghcr.io/metorial/mcp-container--apinetwork--piapi-mcp-server--piapi-mcp-server",
"node dist/index.js"
],
"env": {
"PIAPI_API_KEY": "piapi-api-key"
}
}
}
}