概要
インボックスゼロとは?
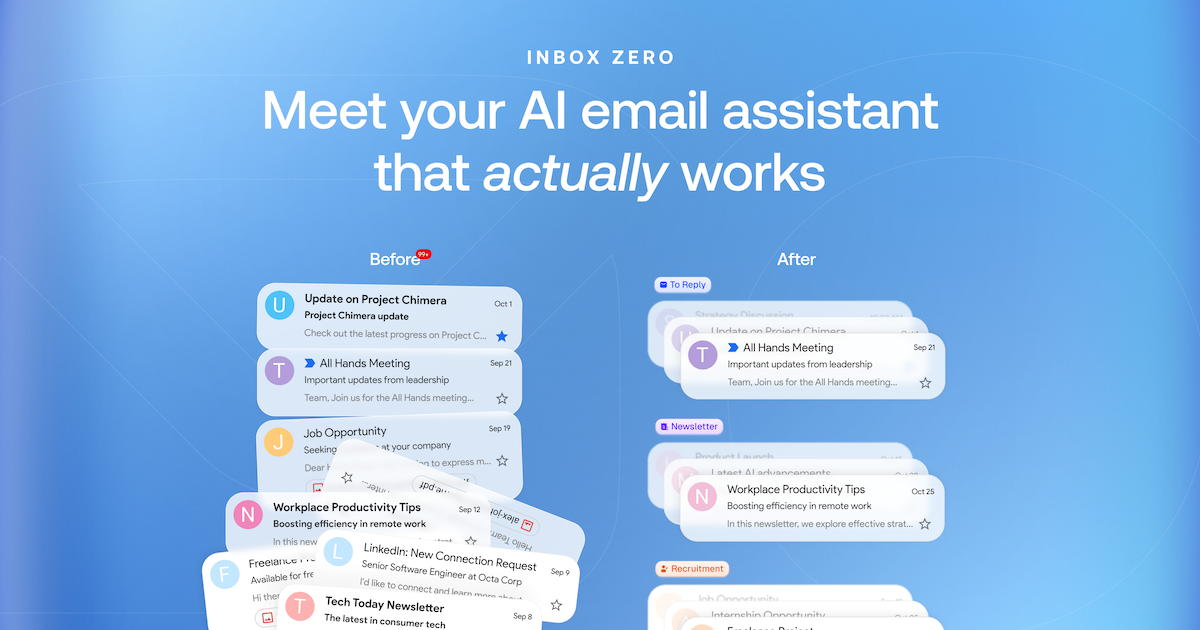
インボックスゼロは、ユーザーがメールを効率的に管理し、「インボックスゼロ」の状態を達成するために設計された革新的なオープンソースアプリケーションです。この概念は、受信トレイを空にするか、できるだけ空に保つことを指し、ユーザーが未読メールの気を散らすことなく重要なタスクに集中できるようにします。このアプリは、メール管理を簡素化するツールと機能を提供し、ユーザーがメッセージを優先し、迅速に応答するのを容易にします。
インボックスゼロの特徴
- ユーザーフレンドリーなインターフェース:アプリケーションは、ナビゲーションを簡素化し、ユーザー体験を向上させるクリーンで直感的なデザインを誇ります。
- メールのカテゴリ分け:優先度、送信者、または件名に基づいてメールを自動的に異なるフォルダーに分類し、ユーザーが重要なメッセージを迅速に特定できるようにします。
- タスク管理ツールとの統合:メールを実行可能なタスクに変換するために、タスク管理ツールとシームレスに統合し、何も見落とさないようにします。
- カスタマイズ可能な通知:重要なメールについて最新情報を受け取るための個別の通知設定を行い、常に通知に圧倒されることを避けます。
- 検索機能:高度な検索オプションにより、特定のメールを迅速に見つけることができ、時間と労力を節約します。
- オープンソース:オープンソースプロジェクトであるため、ユーザーはその開発に貢献し、機能をカスタマイズし、アプリがニーズに応じて進化することを保証できます。
インボックスゼロの使い方
- ダウンロードとインストール: getinboxzero.com を訪れてアプリケーションをダウンロードし、インストール手順に従ってください。
- メールを接続:インストールが完了したら、アプリにメールアカウントを接続してシームレスな統合を実現します。
- カテゴリを設定:仕事、個人、緊急などの好みに基づいてメールカテゴリをカスタマイズします。
- 通知を管理:重要なメールのアラートを受け取るために通知設定を調整し、気を散らす要素を最小限に抑えます。
- 整理を開始:メールを整理し、カテゴリ分けし、重要なメッセージをタスクに変換し始めます。
- インボックスゼロを維持:定期的に受信トレイをチェックし、メールに迅速に応答し、受信トレイを整理してインボックスゼロを達成し維持します。
よくある質問
Q: インボックスゼロは無料で使用できますか?
A: はい、インボックスゼロはオープンソースアプリケーションであり、ダウンロードして使用するのは無料です。
Q: インボックスゼロの機能をカスタマイズできますか?
A: もちろんです!オープンソースであるため、ユーザーは特定のニーズや好みに合わせてアプリケーションを変更できます。
Q: インボックスゼロは複数のメールアカウントをサポートしていますか?
A: はい、複数のメールアカウントをインボックスゼロに接続でき、すべてのメールを一箇所で管理できます。
Q: インボックスゼロは生産性にどのように役立ちますか?
A: メールを整理し、それをタスクに変換することで、インボックスゼロはユーザーが最も重要なことに集中できるようにし、ストレスを軽減し、生産性を向上させます。
Q: インボックスゼロのサポートはどこで見つけられますか?
A: 公式の GitHubリポジトリ またはアプリのウェブサイトでサポートやコミュニティディスカッションを見つけることができます。
詳細
About
There are two parts to Inbox Zero:
- An AI email assistant that helps you spend less time on email.
- Open source AI email client.
If you're looking to contribute to the project, the email client is the best place to do this.
Thanks to Vercel for sponsoring Inbox Zero in support of open-source software.
Features
- AI Personal Assistant: Manages your email for you based on a plain text prompt file. It can take any action a human assistant can take on your behalf (Draft reply, Label, Archive, Reply, Forward, Mark Spam, and even call a webhook).
- Reply Zero: Track emails that need your reply and those awaiting responses.
- Smart Categories: Categorize everyone that's ever emailed you.
- Bulk Unsubscriber: Quickly unsubscribe from emails you never read in one-click.
- Cold Email Blocker: Automatically block cold emails.
- Email Analytics: Track your email activity with daily, weekly, and monthly stats.
Learn more in our docs.
Feature Screenshots
| |
|
| :: | :-: |
| AI Assistant | Reply Zero |
|
|
|
| Gmail client | Bulk Unsubscriber |
Demo Video
Built with
Star History
Feature Requests
To request a feature open a GitHub issue, or join our Discord.
Getting Started for Developers
We offer a hosted version of Inbox Zero at https://getinboxzero.com. To self-host follow the steps below.
Setup
Here's a video on how to set up the project. It covers the same steps mentioned in this document. But goes into greater detail on setting up the external services.
Requirements
- Node.js >= 18.0.0
- pnpm >= 8.6.12
- Docker desktop (recommended but optional)
Make sure you have the above installed before starting.
The external services that are required are (detailed setup instructions below):
Updating .env file: secrets
Create your own .env
file from the example supplied:
cp apps/web/.env.example apps/web/.env
cd apps/web
pnpm install
Set the environment variables in the newly created .env
. You can see a list of required variables in: apps/web/env.ts
.
The required environment variables:
Secrets:
NEXTAUTH_SECRET
-- can be any random string (try usingopenssl rand -hex 32
for a quick secure random string)GOOGLE_ENCRYPT_SECRET
-- Secret key for encrypting OAuth tokens (try usingopenssl rand -hex 32
for a secure key)GOOGLE_ENCRYPT_SALT
-- Salt for encrypting OAuth tokens (try usingopenssl rand -hex 16
for a secure salt)
Redis:
UPSTASH_REDIS_URL
-- Redis URL from Upstash. (can be empty if you are using Docker Compose)UPSTASH_REDIS_TOKEN
-- Redis token from Upstash. (or specify your own random string if you are using Docker Compose)
When using Vercel with Fluid Compute turned off, you should set MAX_DURATION=300
or lower. See Vercel limits for different plans here.
Updating .env file with Google OAuth credentials:
GOOGLE_CLIENT_ID
-- Google OAuth client ID. More info hereGOOGLE_CLIENT_SECRET
-- Google OAuth client secret. More info here
Go to Google Cloud. Create a new project if necessary.
Create new credentials:
-
If the banner shows up, configure consent screen (if not, you can do this later)
- Click the banner, then Click
Get Started
. - Choose a name for your app, and enter your email.
- In Audience, choose
External
- Enter your contact information
- Agree to the User Data policy and then click
Create
. - Return to APIs and Services using the left sidebar.
- Click the banner, then Click
-
Create new credentials:
- Click the
+Create Credentials
button. Choose OAuth Client ID. - In
Application Type
, ChooseWeb application
- Choose a name for your web client
- In Authorized JavaScript origins, add a URI and enter
http://localhost:3000
- In
Authorized redirect URIs
enterhttp://localhost:3000/api/auth/callback/google
- Click
Create
. - A popup will show up with the new credentials, including the Client ID and secret.
- Click the
-
Update .env file:
- Copy the Client ID to
GOOGLE_CLIENT_ID
- Copy the Client secret to
GOOGLE_CLIENT_SECRET
- Copy the Client ID to
-
Update scopes
- Go to
Data Access
in the left sidebar (or click link above) - Click
Add or remove scopes
- Copy paste the below into the
Manually add scopes
box:
https://www.googleapis.com/auth/userinfo.profile https://www.googleapis.com/auth/userinfo.email https://www.googleapis.com/auth/gmail.modify https://www.googleapis.com/auth/gmail.settings.basic https://www.googleapis.com/auth/contacts
- Click
Update
- Click
Save
in the Data Access page.
- Go to
-
Add yourself as a test user
- Go to Audience
- In the
Test users
section, click+Add users
- Enter your email and press
Save
Updating .env file with LLM parameters
You need to set an LLM, but you can use a local one too:
For the LLM, you can use Anthropic, OpenAI, or Anthropic on AWS Bedrock. You can also use Ollama by setting the following enviroment variables:
OLLAMA_BASE_URL=http://localhost:11434/api
NEXT_PUBLIC_OLLAMA_MODEL=phi3
Note: If you need to access Ollama hosted locally and the application is running on Docker setup, you can use http://host.docker.internal:11434/api
as the base URL. You might also need to set OLLAMA_HOST
to 0.0.0.0
in the Ollama configuration file.
You can select the model you wish to use in the app on the /settings
page of the app.
If you are using local ollama, you can set it to be default:
DEFAULT_LLM_PROVIDER=ollama
If this is the case you must also set the ECONOMY_LLM_PROVIDER
environment variable.
Redis and Postgres
We use Postgres for the database. For Redis, you can use Upstash Redis or set up your own Redis instance.
You can run Postgres & Redis locally using docker-compose
docker-compose up -d # -d will run the services in the background
Running the app
To run the migrations:
pnpm prisma migrate dev
To run the app locally for development (slower):
pnpm run dev
Or from the project root:
turbo dev
To build and run the app locally in production mode (faster):
pnpm run build
pnpm start
Open http://localhost:3000 to view the app in your browser.
Premium
Many features are available only to premium users. To upgrade yourself, make yourself an admin in the .env
: ADMINS=hello@gmail.com
Then upgrade yourself at: http://localhost:3000/admin.
Set up push notifications via Google PubSub to handle emails in real time
Follow instructions here.
Set env var GOOGLE_PUBSUB_TOPIC_NAME
.
When creating the subscription select Push and the url should look something like: https://www.getinboxzero.com/api/google/webhook?token=TOKEN
or https://abc.ngrok-free.app/api/google/webhook?token=TOKEN
where the domain is your domain. Set GOOGLE_PUBSUB_VERIFICATION_TOKEN
in your .env
file to be the value of TOKEN
.
To run in development ngrok can be helpful:
ngrok http 3000
### or with an ngrok domain to keep your endpoint stable (set `XYZ`):
ngrok http --domain=XYZ.ngrok-free.app 3000
And then update the webhook endpoint in the Google PubSub subscriptions dashboard.
To start watching emails visit: /api/google/watch/all
Watching for email updates
Set a cron job to run these: The Google watch is necessary. Others are optional.
"crons": [
{
"path": "/api/google/watch/all",
"schedule": "0 1 * * *"
},
{
"path": "/api/resend/summary/all",
"schedule": "0 16 * * 1"
},
{
"path": "/api/reply-tracker/disable-unused-auto-draft",
"schedule": "0 3 * * *"
}
]
Here are some easy ways to run cron jobs. Upstash is a free, easy option. I could never get the Vercel vercel.json
. Open to PRs if you find a fix for that.
Contributing to the project
You can view open tasks in our GitHub Issues. Join our Discord to discuss tasks and check what's being worked on.
ARCHITECTURE.md explains the architecture of the project (LLM generated).
サーバー設定
{
"mcpServers": {
"mcp-server": {
"command": "docker",
"args": [
"run",
"-i",
"--rm",
"ghcr.io/metorial/mcp-container--elie222--inbox-zero--mcp-server",
"npm run start"
],
"env": {
"API_KEY": "api-key"
}
}
}
}