Aperçu
Qu'est-ce qu'Inbox Zero ?
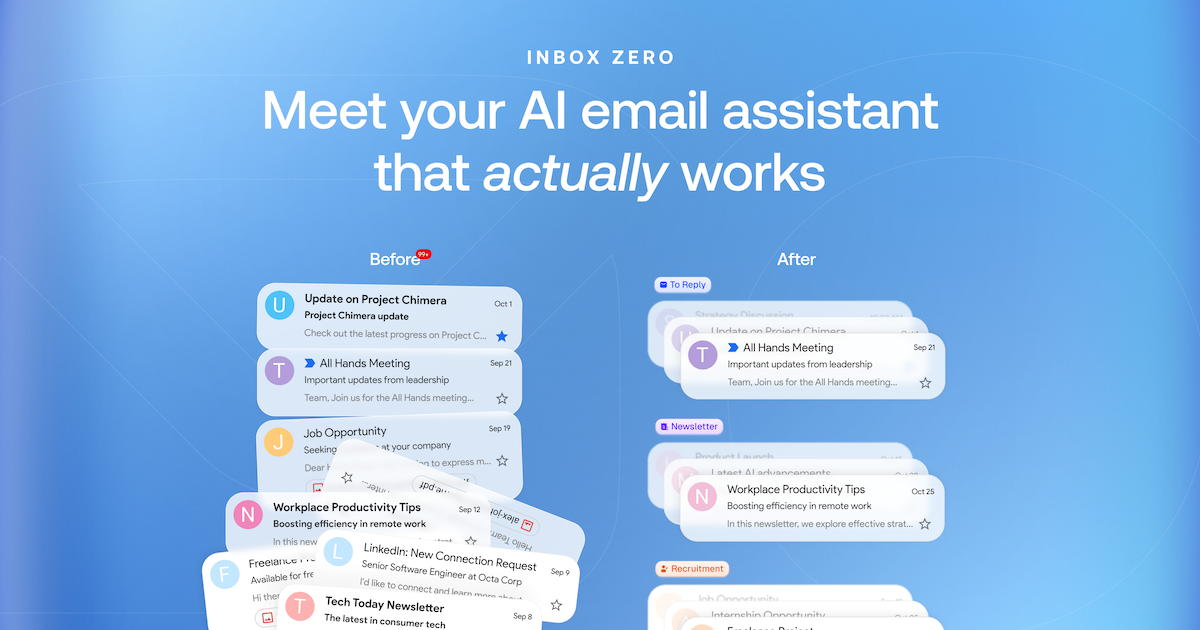
Inbox Zero est une application open-source innovante conçue pour aider les utilisateurs à gérer efficacement leurs e-mails et à atteindre un état de "boîte de réception zéro". Ce concept fait référence à la pratique de garder la boîte de réception vide ou aussi proche que possible de la vide, permettant aux utilisateurs de se concentrer sur des tâches importantes sans la distraction des e-mails non lus. L'application fournit des outils et des fonctionnalités qui rationalisent la gestion des e-mails, facilitant ainsi la priorisation et la réponse rapide aux messages.
Fonctionnalités d'Inbox Zero
- Interface conviviale : L'application se vante d'un design épuré et intuitif qui simplifie la navigation et améliore l'expérience utilisateur.
- Catégorisation des e-mails : Catégorisez automatiquement les e-mails dans différents dossiers en fonction de la priorité, de l'expéditeur ou du sujet, aidant les utilisateurs à identifier rapidement les messages importants.
- Intégration de la gestion des tâches : Intégrez sans effort des outils de gestion des tâches pour convertir les e-mails en tâches actionnables, garantissant que rien ne passe à travers les mailles du filet.
- Notifications personnalisables : Définissez des préférences de notification personnalisées pour rester informé des e-mails importants sans être submergé par des alertes constantes.
- Fonctionnalité de recherche : Des options de recherche avancées permettent aux utilisateurs de trouver rapidement des e-mails spécifiques, économisant ainsi du temps et des efforts.
- Open Source : Étant un projet open-source, les utilisateurs peuvent contribuer à son développement, personnaliser les fonctionnalités et s'assurer que l'application évolue pour répondre à leurs besoins.
Comment utiliser Inbox Zero
- Télécharger et installer : Visitez getinboxzero.com pour télécharger l'application et suivre les instructions d'installation.
- Connecter votre e-mail : Une fois installé, connectez votre(s) compte(s) e-mail à l'application pour une intégration sans faille.
- Configurer les catégories : Personnalisez vos catégories d'e-mails en fonction de vos préférences, telles que travail, personnel ou urgent.
- Gérer les notifications : Ajustez les paramètres de notification pour recevoir des alertes pour les e-mails importants tout en minimisant les distractions.
- Commencer à organiser : Commencez à trier vos e-mails, à les catégoriser et à convertir les messages importants en tâches.
- Maintenir Inbox Zero : Vérifiez régulièrement votre boîte de réception, répondez rapidement aux e-mails et gardez votre boîte de réception organisée pour atteindre et maintenir la boîte de réception zéro.
Questions Fréquemment Posées
Q : Inbox Zero est-il gratuit à utiliser ?
R : Oui, Inbox Zero est une application open-source, ce qui signifie qu'elle est gratuite à télécharger et à utiliser.
Q : Puis-je personnaliser les fonctionnalités d'Inbox Zero ?
R : Absolument ! Étant open-source, les utilisateurs peuvent modifier l'application pour répondre à leurs besoins et préférences spécifiques.
Q : Inbox Zero prend-il en charge plusieurs comptes e-mail ?
R : Oui, vous pouvez connecter plusieurs comptes e-mail à Inbox Zero, vous permettant de gérer tous vos e-mails au même endroit.
Q : Comment Inbox Zero aide-t-il à la productivité ?
R : En organisant les e-mails et en les convertissant en tâches, Inbox Zero aide les utilisateurs à se concentrer sur ce qui compte le plus, réduisant le stress et augmentant la productivité.
Q : Où puis-je trouver de l'aide pour Inbox Zero ?
R : Vous pouvez trouver de l'aide et des discussions communautaires sur le dépôt GitHub officiel ou sur le site web de l'application.
Détail
About
There are two parts to Inbox Zero:
- An AI email assistant that helps you spend less time on email.
- Open source AI email client.
If you're looking to contribute to the project, the email client is the best place to do this.
Thanks to Vercel for sponsoring Inbox Zero in support of open-source software.
Features
- AI Personal Assistant: Manages your email for you based on a plain text prompt file. It can take any action a human assistant can take on your behalf (Draft reply, Label, Archive, Reply, Forward, Mark Spam, and even call a webhook).
- Reply Zero: Track emails that need your reply and those awaiting responses.
- Smart Categories: Categorize everyone that's ever emailed you.
- Bulk Unsubscriber: Quickly unsubscribe from emails you never read in one-click.
- Cold Email Blocker: Automatically block cold emails.
- Email Analytics: Track your email activity with daily, weekly, and monthly stats.
Learn more in our docs.
Feature Screenshots
| |
|
| :: | :-: |
| AI Assistant | Reply Zero |
|
|
|
| Gmail client | Bulk Unsubscriber |
Demo Video
Built with
Star History
Feature Requests
To request a feature open a GitHub issue, or join our Discord.
Getting Started for Developers
We offer a hosted version of Inbox Zero at https://getinboxzero.com. To self-host follow the steps below.
Setup
Here's a video on how to set up the project. It covers the same steps mentioned in this document. But goes into greater detail on setting up the external services.
Requirements
- Node.js >= 18.0.0
- pnpm >= 8.6.12
- Docker desktop (recommended but optional)
Make sure you have the above installed before starting.
The external services that are required are (detailed setup instructions below):
Updating .env file: secrets
Create your own .env
file from the example supplied:
cp apps/web/.env.example apps/web/.env
cd apps/web
pnpm install
Set the environment variables in the newly created .env
. You can see a list of required variables in: apps/web/env.ts
.
The required environment variables:
Secrets:
NEXTAUTH_SECRET
-- can be any random string (try usingopenssl rand -hex 32
for a quick secure random string)GOOGLE_ENCRYPT_SECRET
-- Secret key for encrypting OAuth tokens (try usingopenssl rand -hex 32
for a secure key)GOOGLE_ENCRYPT_SALT
-- Salt for encrypting OAuth tokens (try usingopenssl rand -hex 16
for a secure salt)
Redis:
UPSTASH_REDIS_URL
-- Redis URL from Upstash. (can be empty if you are using Docker Compose)UPSTASH_REDIS_TOKEN
-- Redis token from Upstash. (or specify your own random string if you are using Docker Compose)
When using Vercel with Fluid Compute turned off, you should set MAX_DURATION=300
or lower. See Vercel limits for different plans here.
Updating .env file with Google OAuth credentials:
GOOGLE_CLIENT_ID
-- Google OAuth client ID. More info hereGOOGLE_CLIENT_SECRET
-- Google OAuth client secret. More info here
Go to Google Cloud. Create a new project if necessary.
Create new credentials:
-
If the banner shows up, configure consent screen (if not, you can do this later)
- Click the banner, then Click
Get Started
. - Choose a name for your app, and enter your email.
- In Audience, choose
External
- Enter your contact information
- Agree to the User Data policy and then click
Create
. - Return to APIs and Services using the left sidebar.
- Click the banner, then Click
-
Create new credentials:
- Click the
+Create Credentials
button. Choose OAuth Client ID. - In
Application Type
, ChooseWeb application
- Choose a name for your web client
- In Authorized JavaScript origins, add a URI and enter
http://localhost:3000
- In
Authorized redirect URIs
enterhttp://localhost:3000/api/auth/callback/google
- Click
Create
. - A popup will show up with the new credentials, including the Client ID and secret.
- Click the
-
Update .env file:
- Copy the Client ID to
GOOGLE_CLIENT_ID
- Copy the Client secret to
GOOGLE_CLIENT_SECRET
- Copy the Client ID to
-
Update scopes
- Go to
Data Access
in the left sidebar (or click link above) - Click
Add or remove scopes
- Copy paste the below into the
Manually add scopes
box:
https://www.googleapis.com/auth/userinfo.profile https://www.googleapis.com/auth/userinfo.email https://www.googleapis.com/auth/gmail.modify https://www.googleapis.com/auth/gmail.settings.basic https://www.googleapis.com/auth/contacts
- Click
Update
- Click
Save
in the Data Access page.
- Go to
-
Add yourself as a test user
- Go to Audience
- In the
Test users
section, click+Add users
- Enter your email and press
Save
Updating .env file with LLM parameters
You need to set an LLM, but you can use a local one too:
For the LLM, you can use Anthropic, OpenAI, or Anthropic on AWS Bedrock. You can also use Ollama by setting the following enviroment variables:
OLLAMA_BASE_URL=http://localhost:11434/api
NEXT_PUBLIC_OLLAMA_MODEL=phi3
Note: If you need to access Ollama hosted locally and the application is running on Docker setup, you can use http://host.docker.internal:11434/api
as the base URL. You might also need to set OLLAMA_HOST
to 0.0.0.0
in the Ollama configuration file.
You can select the model you wish to use in the app on the /settings
page of the app.
If you are using local ollama, you can set it to be default:
DEFAULT_LLM_PROVIDER=ollama
If this is the case you must also set the ECONOMY_LLM_PROVIDER
environment variable.
Redis and Postgres
We use Postgres for the database. For Redis, you can use Upstash Redis or set up your own Redis instance.
You can run Postgres & Redis locally using docker-compose
docker-compose up -d # -d will run the services in the background
Running the app
To run the migrations:
pnpm prisma migrate dev
To run the app locally for development (slower):
pnpm run dev
Or from the project root:
turbo dev
To build and run the app locally in production mode (faster):
pnpm run build
pnpm start
Open http://localhost:3000 to view the app in your browser.
Premium
Many features are available only to premium users. To upgrade yourself, make yourself an admin in the .env
: ADMINS=hello@gmail.com
Then upgrade yourself at: http://localhost:3000/admin.
Set up push notifications via Google PubSub to handle emails in real time
Follow instructions here.
Set env var GOOGLE_PUBSUB_TOPIC_NAME
.
When creating the subscription select Push and the url should look something like: https://www.getinboxzero.com/api/google/webhook?token=TOKEN
or https://abc.ngrok-free.app/api/google/webhook?token=TOKEN
where the domain is your domain. Set GOOGLE_PUBSUB_VERIFICATION_TOKEN
in your .env
file to be the value of TOKEN
.
To run in development ngrok can be helpful:
ngrok http 3000
### or with an ngrok domain to keep your endpoint stable (set `XYZ`):
ngrok http --domain=XYZ.ngrok-free.app 3000
And then update the webhook endpoint in the Google PubSub subscriptions dashboard.
To start watching emails visit: /api/google/watch/all
Watching for email updates
Set a cron job to run these: The Google watch is necessary. Others are optional.
"crons": [
{
"path": "/api/google/watch/all",
"schedule": "0 1 * * *"
},
{
"path": "/api/resend/summary/all",
"schedule": "0 16 * * 1"
},
{
"path": "/api/reply-tracker/disable-unused-auto-draft",
"schedule": "0 3 * * *"
}
]
Here are some easy ways to run cron jobs. Upstash is a free, easy option. I could never get the Vercel vercel.json
. Open to PRs if you find a fix for that.
Contributing to the project
You can view open tasks in our GitHub Issues. Join our Discord to discuss tasks and check what's being worked on.
ARCHITECTURE.md explains the architecture of the project (LLM generated).
Configuration du serveur
{
"mcpServers": {
"mcp-server": {
"command": "docker",
"args": [
"run",
"-i",
"--rm",
"ghcr.io/metorial/mcp-container--elie222--inbox-zero--mcp-server",
"npm run start"
],
"env": {
"API_KEY": "api-key"
}
}
}
}