🚀 ⚡️ K6 Mcp 伺服器
k6 MCP 伺服器
概覽
k6 MCP 伺服器是什麼?
k6 MCP 伺服器是一個強大的工具,旨在對應用程序進行性能測試和負載測試。它利用了 k6 測試框架的能力,該框架以其高效性和易用性而聞名。MCP(微服務控制平面)伺服器允許用戶管理和協調多個 k6 測試腳本,實現與 CI/CD 管道的無縫集成,並提供一個集中平台來監控和分析性能指標。
k6 MCP 伺服器的特點
- 集中管理:k6 MCP 伺服器提供單一界面來管理多個性能測試,使得在不同環境中組織和執行測試變得更容易。
- 實時監控:用戶可以實時監控測試結果,立即獲得應用程序性能的洞察,快速識別瓶頸。
- 與 CI/CD 集成:該伺服器可以輕鬆集成到現有的 CI/CD 工作流程中,促進自動化性能測試作為開發過程的一部分。
- 可擴展性:設計用於處理大量並發用戶,k6 MCP 伺服器可以模擬複雜的用戶場景,以測試應用程序在負載下的性能。
- 詳細報告:該伺服器生成全面的報告,提供各種性能指標的洞察,幫助團隊根據數據做出明智的決策。
如何使用 k6 MCP 伺服器
- 安裝:首先在您首選的環境中安裝 k6 MCP 伺服器。請參閱官方文檔以獲取詳細的安裝說明。
- 配置:配置伺服器設置以匹配您的測試需求。這包括設置測試腳本、用戶場景和性能閾值。
- 運行測試:使用伺服器界面啟動性能測試。您可以選擇特定的測試腳本並定義要模擬的虛擬用戶數量。
- 監控:在測試運行期間,通過伺服器儀表板實時監控性能指標。
- 分析結果:測試完成後,查看生成的報告以分析性能數據並識別需要解決的任何問題。
常見問題
k6 MCP 伺服器的主要目的是什么?
k6 MCP 伺服器的主要目的是促進應用程序的性能測試和負載測試,提供一個集中平台來管理多個測試腳本和監控結果。
我可以將 k6 MCP 伺服器與我現有的 CI/CD 管道集成嗎?
是的,k6 MCP 伺服器設計為與 CI/CD 管道無縫集成,允許自動化性能測試作為開發工作流程的一部分。
k6 MCP 伺服器如何處理大規模測試?
k6 MCP 伺服器旨在擴展,允許用戶模擬大量並發用戶和複雜的用戶場景,使其非常適合在高負載下測試應用程序。
k6 MCP 伺服器生成什麼類型的報告?
k6 MCP 伺服器生成詳細的性能報告,包括響應時間、吞吐量、錯誤率和資源利用率等指標,幫助團隊全面了解應用程序性能。
使用 k6 MCP 伺服器需要許可證嗎?
是的,k6 MCP 伺服器在 MIT 許可證下提供,允許免費使用、修改和分發。
詳細
🚀 ⚡️ k6-mcp-server
A Model Context Protocol (MCP) server implementation for running k6 load tests.
✨ Features
- Simple integration with Model Context Protocol framework
- Support for custom test durations and virtual users (VUs)
- Easy-to-use API for running k6 load tests
- Configurable through environment variables
- Real-time test execution output
🔧 Prerequisites
Before you begin, ensure you have the following installed:
- Python 3.12 or higher
- k6 load testing tool (Installation guide)
- uv package manager (Installation guide)
📦 Installation
- Clone the repository:
git clone https://github.com/qainsights/k6-mcp-server.git
- Install the required dependencies:
uv pip install -r requirements.txt
- Set up environment variables (optional):
Create a
.envfile in the project root:
K6_BIN=/path/to/k6 # Optional: defaults to 'k6' in system PATH
🚀 Getting Started
- Create a k6 test script (e.g.,
test.js):
import http from "k6/http";
import { sleep } from "k6";
export default function () {
http.get("http://test.k6.io");
sleep(1);
}
- Configure the MCP server using the below specs in your favorite MCP client (Claude Desktop, Cursor, Windsurf and more):
{
"mcpServers": {
"k6": {
"command": "/path/to/bin/uv",
"args": [
"--directory",
"/path/to/k6-mcp-server",
"run",
"k6_server.py"
]
}
}
}
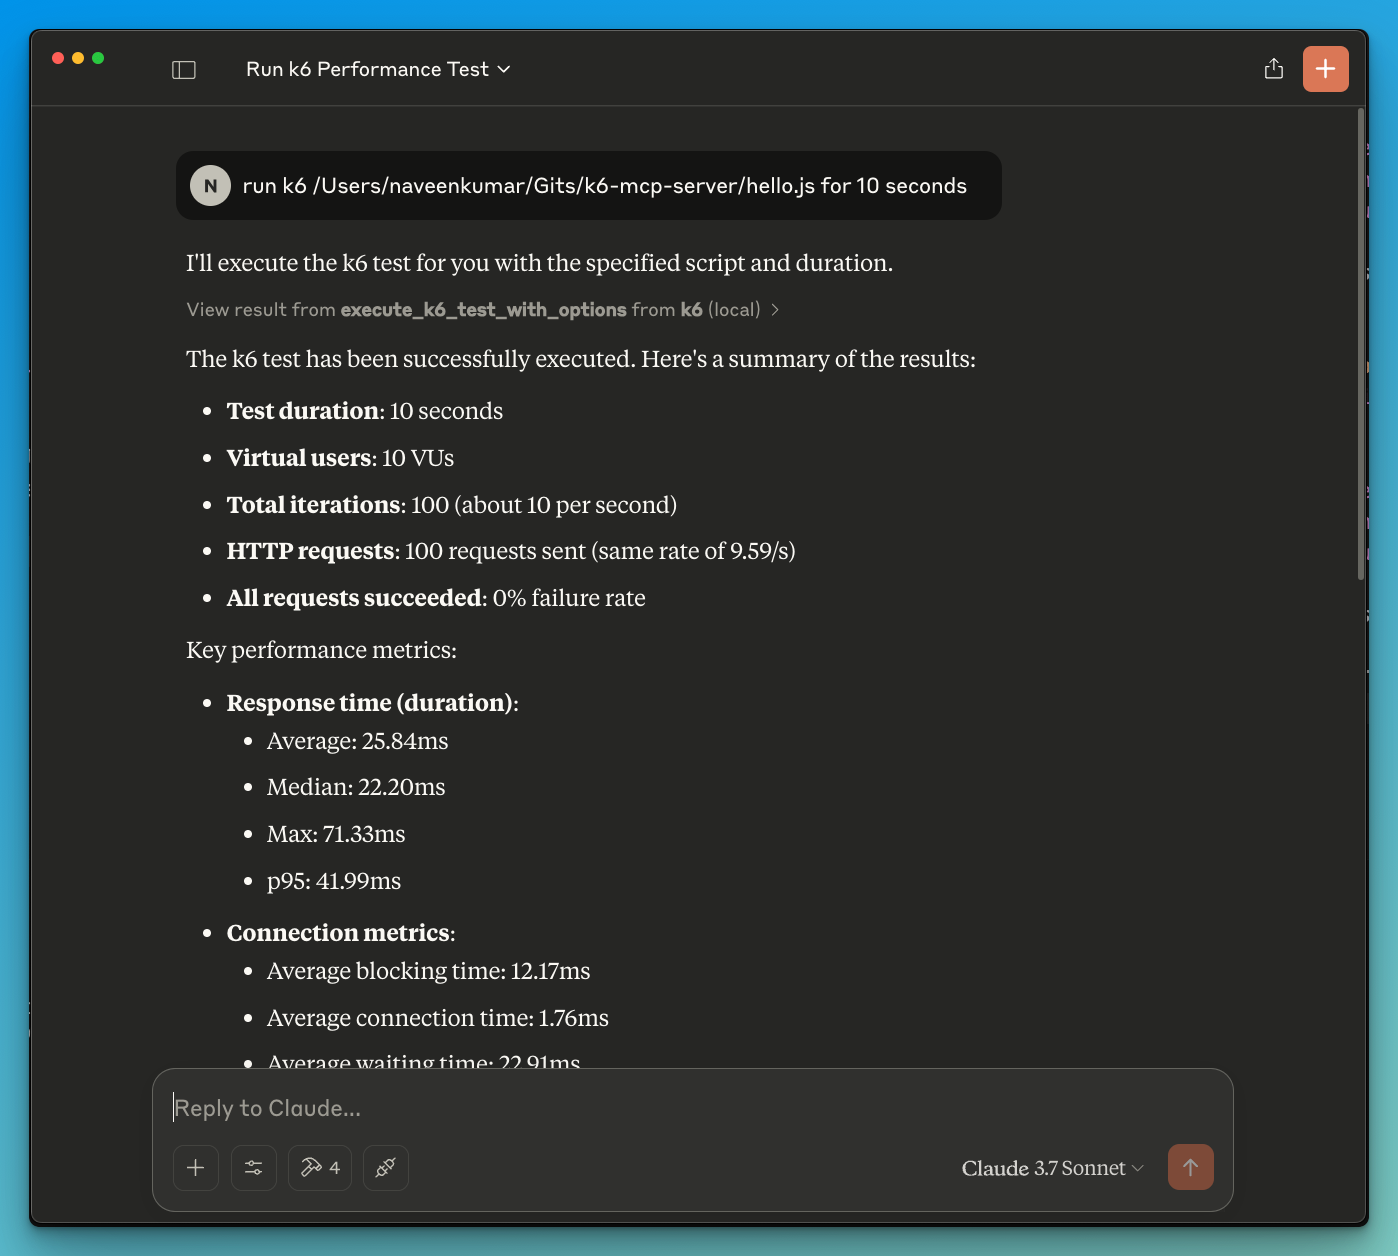
- Now ask the LLM to run the test e.g.
run k6 test for hello.js. The k6 mcp server will leverage either one of the below tools to start the test.
execute_k6_test: Run a test with default options (30s duration, 10 VUs)execute_k6_test_with_options: Run a test with custom duration and VUs

📝 API Reference
Execute K6 Test
execute_k6_test(
script_file: str,
duration: str = "30s", # Optional
vus: int = 10 # Optional
)
Execute K6 Test with Custom Options
execute_k6_test_with_options(
script_file: str,
duration: str,
vus: int
)
✨ Use cases
- LLM powered results analysis
- Effective debugging of load tests
🤝 Contributing
Contributions are welcome! Please feel free to submit a Pull Request.
📄 License
This project is licensed under the MIT License - see the LICENSE file for details.
伺服器配置
{
"mcpServers": {
"k-6-mcp-server": {
"command": "docker",
"args": [
"run",
"-i",
"--rm",
"ghcr.io/metorial/mcp-container--qainsights--k6-mcp-server--k-6-mcp-server",
"python main.py"
],
"env": {}
}
}
}